ShopDreamUp AI ArtDreamUp
Deviation Actions

This Month's Projects
Fundamentals of Animation Video: youtu.be/bFC9H8IvNmQ
Compositing Fundamentals Video: youtu.be/WUStiBzEBaU
CFM Project 1 (Outdoor Composite): fav.me/d55iixj
CFM Project 10 (Tron Matte): fav.me/d55ijpo
CFM Project 20 (Stereoscopic Conversion: Sin City 1): fav.me/d55ikc2
CMF Project 21 (Stereoscopic Conversion: Sin City 2): fav.me/d55iksq
2D Animation Grade Confirmed: 95%. This only increased my GPA by a margin, so a 3.7 GPA may take a couple months, just got to keep working hard and doing well.
Last Month
Last month was Compositing Fundamentals (CFM) and Fundamentals of Animation (FoA). It was a very easy month, and I didn't really get excited about any of the projects till FoA's Final Project. FoA was mainly getting use to the graph editor in Maya to create the in-betweens of 2DA and adjust how the character moves. And CFM was understanding a new program called Nuke. I didn't know what compositing was till I took the class. To my understanding, compositing is like Photo Manipulation in Photoshop, but using that knowledge and bring it into image sequences, or videos.
Both classes I had to go to lab from 5am-9am and lecture at 1pm-5pm. I volunteered to go to 5am labs because I wanted to be ready for that kind of schedule if I ever get into that kind of schedule when I get a job in the industry. It was almost torturous, but I made it.
CFM Assignments (in the order shown in the video)
I am happy that the CFM projects were able to be completed within the time frame of labs, but I didn't feel like I learned very much. We followed tutorials, and if we followed those, we would pass with no problems. Good for students who want it easy, but I'm not that kind of student. I don't like running through a tutorial to follow instructions and retain a little of what I just learned; I like to experiment and understand the tool I am learning before I move on and learn another tool, then push what I do know to another level. I didn't feel I could do that in CFM with constantly being exhausted from 5am classes and passing out every time I was free from school.
Section 1: Nuke's Layering System
Just like layering in Photoshop, you can control each layer to manipulate and affect what is pertained to that layer or to the whole image. Except Photoshop is restricted to each image separately whereas Nuke can affect a whole sequence of images.
Project 1: Outdoor Composite
A simple layering of Foreground, Midground, and Background Materials. I changed the car's color for fun.
Project 2: Audi Car Composite
An intense amount of layers, but with the same challenge as Project 1, with an extra challenge to change the hue of the entire sequence to blue then and blur the outside to focus on the car.
Project 3: Red Truck Composite
This project dealt with more tools than Project 2, including adding grain the truck to match the background sequence.
Section 2: Tracking
This section dealt with tracking the movement of the entire shot, and add assets to the scene to have it move with the rest of the shot. To do this, you can use the a tool called a Tracker, Corner Pin, or Planar Tracker. Unfortunately, I cannot show my Planar Tracker project till after it has been released to the public by the company due to the Non-Disclosure Agreement that I have to abide by.
Project 4: Door Tracking
Track the movement in position, rotate, and scale to add text to the shot.
Project 5: Stabilized Bird Tracking
Track the movement of the camera and stabilize the primary focus of the shot. I cropped out the borders that were cutting out for a better quality shot.
Project 6: London Smoke Track
Track the movement in position to add smoke to one of the chimneys in the scene.
Project 7: MIB 3 Sign Track
Use 4 Trackers and use them to track the position, scale, and rotate of each corner and add that information to the corners of the asset.
Project 8: The 4 "No's" Sign Track
Use the Corner Pin tool to track the position of each corner in the shot to the corners of the asset.
Project 9: Broken Glass on and Mustang-advertised Truck Track
Use the Corner Pin tool to track the position of each corner in the shot to the corners of the assets.
Section 3: Mattes and Rotoscoping
This section pertains to creating black and white images to be placed between different planes of the shot. White keeps the information of the frontal image intact while black erases the information from the shot. Rotoscoping is like a lasso tool that you can animate (inside the selection is white, outside the selection is black) while Mattes go off color information, and erases the chosen color information from the shot. Since Mattes go off color information, if a character would move, the matte would follow that change in color information.
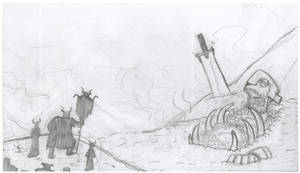
Project 10: Tron Matte
Create a Matte to enter "Tron" into the shot. As an extra challenge, give Tron some glow and glint to his discs.
Project 11: Green Lantern Rotoscope
Use a Tracker to follow the movement of Green Lantern, then use the Roto tool to create an alpha.
Project 12: "Some Movie" Matte
Create a Matte for the character on stage and the audience and add them to the background.
Section 4: Cleanup and Removal
This section takes Rotoscoping in a different direction using the Clone subtool to overlay unwanted information into the shot. Some shots require what is called a "Clean Plate," an image, or sequence of images, free from unwanted assets and used to overlay those unwanted assets.
Project 13: "Some Movie's" Clean-Up 1
Use the Roto Clone tool to remove the boom mic, electrical pole, and the cropped out character from the scene
Project 13: "Some Movie's" Clean-Up 2
Use the Roto Clone tool to remove the electrical pole, and the cropped out character from the scene (That's sad the same character had to be removed at least twice from the movie. DX)
Project 14: "Some Movie's" Clean-Up 3
Remove the scratch created by the damaged film. Nuke has a different tool called the "Dust Bust" tool. It acts like the Roto Clone tool but will appear and disappear for that one image/frame.
Project 15: Sign Removal
Use the Roto Clone tool to remove the "Tow Sign" from the wall in the scene.
Project 16: Mission: Impossible Wire Removal
A Clean Plate has been provided. Use a Tracker to track position and scale movement, then input that movement to the Clean Plate. Use the Roto Reveal tool to push the Clean Plate information in front of the the wires holding the character, removing them from the scene.
Project 17: Box Removal 1
Use Photoshop's Content Aware tool to create a Clean Plate. Track the position, rotate, and scale movement of the shot, then use the Roto reveal tool to push the clean Plate information in front of the Box, its shadow, and the shadow of the character, removing them from the scene.
Project 18: Box Removal 2
Use Photoshop's Clone tool to create a Clean Plate to match the shadow created by the pillar and the crease in the sidewalk, track the position, rotate, and scale movement in the scene, then use the Roto reveal tool to push the Clean Plate information in front of the Box, its shadow, and the shadow of the character, removing them from the scene.
Section 5: 3D Card System
3D is a different section of Nuke altogether than using the 2D space. In 3D space, layers can placed onto cards and be spaced away from each other whereas 2D space positions the layers as pieces of paper stacked on top of each other. Cards can then be subdivided and each division can have its own position to give images perspective. Something you have to watch out for, because they are still flat images, the camera will reveal it the 2D image if the camera is angled to its flat angle of the 2D image.
Project 19: 3D Rooftop Scene
Use the card system in Nuke to manipulate the different layers in the 3D scene interface. Then animate a camera moving through 3D space. The vent on the left was giving me issues during my camera animation, so which is why you see my camera move away from my vent.
Section 6: 3D Stereoscopic Conversion
Using the 3D scene interface again, we can create 2 cameras to separate the image into two colors, red and blue. But instead of spacing the layers, we are using the cameras to shift the color information and what would be seen in the 3D cameras. So when we put on the 3D red/blue glasses on, the color information will bounce into our eyes and create that 3D effect.
Project 20: Sin City 3D Stereoscopic Conversion 1
When alphas for stereoscopic conversion are flat black and white images, they create flat 3D images. This type of effect would be good if we wanted the asset to be flat in 3D space, or a asset with little impact can really stand out if its alpha matte is pure white
Project 21: Sin City 3D Stereoscopic Conversion 2
When alphas are shades of gray with a falloff pattern to black, the 2D image looks more like 3-dimensional world. This can be done to both the mid ground and background assets. Foreground assets usually are placed under what is called "Zero space," where 3D has no effect on the assets. In this image, Zero Space is placed where the character's faces are.
FoA Assignments (in the order shown in the video)
FoA was a bit easier on the learning because each class focused on the graph editor only. The only thing that changed was how many controls and how many characters to control were in each project. When FoA got to the final assignment, I knew we would have more time to work on this project than the previous 3, so I could really play around the graph editor and push what I've learned to something challenging. The instructor was leery at first, but when I animated the part he was worried about, he gave me the okay to continue.
Project 1: Natural Ball
Use the graph editor to create a ball naturally moving in the path it must follow. Must use squash, stretch, at least 3 bounces, and the ball turning while rolling.
Project 2: Spirited Ball
Give the ball character and personality. Have it interact with the pre-animated gator and have it attempt to reach the other side. Like I said, the gator was pre-animated, I did not animate it. So we had to find a way that the ball would act and react naturally to how the gator was acting. I chose for the ball to make it, but then not make it. Wile E. Coyote came to mind on this project.
Project 3: Natural Box
Animate the character pushing the box off the cliff. The box must move naturally and indicate its weight weight. I chose a heavier box. It was much more fun to have the character almost use to much force and fall off the cliff.
Project 4: "This is MY HOUSE!"
Animate the legs, box, and ball in 220-260 frames. The legs must shift and put a foot on the box and kick the box. How the rest of the animation plays out was up to the student. I wanted to do something a little more challenging and have the legs turn the box over before kicking it. The instructor worried that was going to be too difficult, even though he and the assistants liked it. So I completed the box turn over for him to prove I could do it, then he allowed me to animate the rest. What was the difficult issue was timing. I did not set my key poses in the right timing, and as I worked, I was following that animation till the graph editor was a huge mess. Here I thought I was going to have my animation be too fast. However, my animation was too slow. Time to learn from my mistakes and set those keys up correctly before working my in-betweens.
This Month: Rigging Basics (RBA) & Production Modeling (PRM)
So far the schedule is somewhat back to normal. 5pm-9pm lectures and 9am-1pm labs is more suitable to me than getting up so early in the morning. But I wish I could go back to the schedule of having lab right after lecture so I would have 52 hour time span to finish the work before moving on to the next lecture than 4 hours.
RBA is rigging from what I learned in 3DF, but later on in the month we will learn scripting and how to make our own toolsets. I've never been a programmer or learned coding, and so far rigging and scripting worry me. I better put an extra foot forward in this class.
As for PRM, it is also like 3DF, but with the objective of learning a new program. I've gotten use to the Maya interface, but ZBrush will take more getting use to. The zoom and pan rotate tools are extremely different than Maya, and it may be because I am now using a pen instead of a mouse to cruise around the program. We are doing nothing but Speed Sculpts, and I fear the instructors want us to get use to the tools while working fast. I am freaking out, I am not use to ZBrush and I'm trying to exert out as much quality work I can out at such a beginner stage. I am definitely using this summer break to play with ZBrush.
Speaking of which, I could really use that break. Been exhausted and stressed out lately, that I could use some time to just not think about schoolwork for just a few days. Till next month!
Fundamentals of Animation Video: youtu.be/bFC9H8IvNmQ
Compositing Fundamentals Video: youtu.be/WUStiBzEBaU
CFM Project 1 (Outdoor Composite): fav.me/d55iixj
CFM Project 10 (Tron Matte): fav.me/d55ijpo
CFM Project 20 (Stereoscopic Conversion: Sin City 1): fav.me/d55ikc2
CMF Project 21 (Stereoscopic Conversion: Sin City 2): fav.me/d55iksq
2D Animation Grade Confirmed: 95%. This only increased my GPA by a margin, so a 3.7 GPA may take a couple months, just got to keep working hard and doing well.
Last Month
Last month was Compositing Fundamentals (CFM) and Fundamentals of Animation (FoA). It was a very easy month, and I didn't really get excited about any of the projects till FoA's Final Project. FoA was mainly getting use to the graph editor in Maya to create the in-betweens of 2DA and adjust how the character moves. And CFM was understanding a new program called Nuke. I didn't know what compositing was till I took the class. To my understanding, compositing is like Photo Manipulation in Photoshop, but using that knowledge and bring it into image sequences, or videos.
Both classes I had to go to lab from 5am-9am and lecture at 1pm-5pm. I volunteered to go to 5am labs because I wanted to be ready for that kind of schedule if I ever get into that kind of schedule when I get a job in the industry. It was almost torturous, but I made it.
CFM Assignments (in the order shown in the video)
I am happy that the CFM projects were able to be completed within the time frame of labs, but I didn't feel like I learned very much. We followed tutorials, and if we followed those, we would pass with no problems. Good for students who want it easy, but I'm not that kind of student. I don't like running through a tutorial to follow instructions and retain a little of what I just learned; I like to experiment and understand the tool I am learning before I move on and learn another tool, then push what I do know to another level. I didn't feel I could do that in CFM with constantly being exhausted from 5am classes and passing out every time I was free from school.
Section 1: Nuke's Layering System
Just like layering in Photoshop, you can control each layer to manipulate and affect what is pertained to that layer or to the whole image. Except Photoshop is restricted to each image separately whereas Nuke can affect a whole sequence of images.
Project 1: Outdoor Composite
A simple layering of Foreground, Midground, and Background Materials. I changed the car's color for fun.
Project 2: Audi Car Composite
An intense amount of layers, but with the same challenge as Project 1, with an extra challenge to change the hue of the entire sequence to blue then and blur the outside to focus on the car.
Project 3: Red Truck Composite
This project dealt with more tools than Project 2, including adding grain the truck to match the background sequence.
Section 2: Tracking
This section dealt with tracking the movement of the entire shot, and add assets to the scene to have it move with the rest of the shot. To do this, you can use the a tool called a Tracker, Corner Pin, or Planar Tracker. Unfortunately, I cannot show my Planar Tracker project till after it has been released to the public by the company due to the Non-Disclosure Agreement that I have to abide by.
Project 4: Door Tracking
Track the movement in position, rotate, and scale to add text to the shot.
Project 5: Stabilized Bird Tracking
Track the movement of the camera and stabilize the primary focus of the shot. I cropped out the borders that were cutting out for a better quality shot.
Project 6: London Smoke Track
Track the movement in position to add smoke to one of the chimneys in the scene.
Project 7: MIB 3 Sign Track
Use 4 Trackers and use them to track the position, scale, and rotate of each corner and add that information to the corners of the asset.
Project 8: The 4 "No's" Sign Track
Use the Corner Pin tool to track the position of each corner in the shot to the corners of the asset.
Project 9: Broken Glass on and Mustang-advertised Truck Track
Use the Corner Pin tool to track the position of each corner in the shot to the corners of the assets.
Section 3: Mattes and Rotoscoping
This section pertains to creating black and white images to be placed between different planes of the shot. White keeps the information of the frontal image intact while black erases the information from the shot. Rotoscoping is like a lasso tool that you can animate (inside the selection is white, outside the selection is black) while Mattes go off color information, and erases the chosen color information from the shot. Since Mattes go off color information, if a character would move, the matte would follow that change in color information.
Project 10: Tron Matte
Create a Matte to enter "Tron" into the shot. As an extra challenge, give Tron some glow and glint to his discs.
Project 11: Green Lantern Rotoscope
Use a Tracker to follow the movement of Green Lantern, then use the Roto tool to create an alpha.
Project 12: "Some Movie" Matte
Create a Matte for the character on stage and the audience and add them to the background.
Section 4: Cleanup and Removal
This section takes Rotoscoping in a different direction using the Clone subtool to overlay unwanted information into the shot. Some shots require what is called a "Clean Plate," an image, or sequence of images, free from unwanted assets and used to overlay those unwanted assets.
Project 13: "Some Movie's" Clean-Up 1
Use the Roto Clone tool to remove the boom mic, electrical pole, and the cropped out character from the scene
Project 13: "Some Movie's" Clean-Up 2
Use the Roto Clone tool to remove the electrical pole, and the cropped out character from the scene (That's sad the same character had to be removed at least twice from the movie. DX)
Project 14: "Some Movie's" Clean-Up 3
Remove the scratch created by the damaged film. Nuke has a different tool called the "Dust Bust" tool. It acts like the Roto Clone tool but will appear and disappear for that one image/frame.
Project 15: Sign Removal
Use the Roto Clone tool to remove the "Tow Sign" from the wall in the scene.
Project 16: Mission: Impossible Wire Removal
A Clean Plate has been provided. Use a Tracker to track position and scale movement, then input that movement to the Clean Plate. Use the Roto Reveal tool to push the Clean Plate information in front of the the wires holding the character, removing them from the scene.
Project 17: Box Removal 1
Use Photoshop's Content Aware tool to create a Clean Plate. Track the position, rotate, and scale movement of the shot, then use the Roto reveal tool to push the clean Plate information in front of the Box, its shadow, and the shadow of the character, removing them from the scene.
Project 18: Box Removal 2
Use Photoshop's Clone tool to create a Clean Plate to match the shadow created by the pillar and the crease in the sidewalk, track the position, rotate, and scale movement in the scene, then use the Roto reveal tool to push the Clean Plate information in front of the Box, its shadow, and the shadow of the character, removing them from the scene.
Section 5: 3D Card System
3D is a different section of Nuke altogether than using the 2D space. In 3D space, layers can placed onto cards and be spaced away from each other whereas 2D space positions the layers as pieces of paper stacked on top of each other. Cards can then be subdivided and each division can have its own position to give images perspective. Something you have to watch out for, because they are still flat images, the camera will reveal it the 2D image if the camera is angled to its flat angle of the 2D image.
Project 19: 3D Rooftop Scene
Use the card system in Nuke to manipulate the different layers in the 3D scene interface. Then animate a camera moving through 3D space. The vent on the left was giving me issues during my camera animation, so which is why you see my camera move away from my vent.
Section 6: 3D Stereoscopic Conversion
Using the 3D scene interface again, we can create 2 cameras to separate the image into two colors, red and blue. But instead of spacing the layers, we are using the cameras to shift the color information and what would be seen in the 3D cameras. So when we put on the 3D red/blue glasses on, the color information will bounce into our eyes and create that 3D effect.
Project 20: Sin City 3D Stereoscopic Conversion 1
When alphas for stereoscopic conversion are flat black and white images, they create flat 3D images. This type of effect would be good if we wanted the asset to be flat in 3D space, or a asset with little impact can really stand out if its alpha matte is pure white
Project 21: Sin City 3D Stereoscopic Conversion 2
When alphas are shades of gray with a falloff pattern to black, the 2D image looks more like 3-dimensional world. This can be done to both the mid ground and background assets. Foreground assets usually are placed under what is called "Zero space," where 3D has no effect on the assets. In this image, Zero Space is placed where the character's faces are.
FoA Assignments (in the order shown in the video)
FoA was a bit easier on the learning because each class focused on the graph editor only. The only thing that changed was how many controls and how many characters to control were in each project. When FoA got to the final assignment, I knew we would have more time to work on this project than the previous 3, so I could really play around the graph editor and push what I've learned to something challenging. The instructor was leery at first, but when I animated the part he was worried about, he gave me the okay to continue.
Project 1: Natural Ball
Use the graph editor to create a ball naturally moving in the path it must follow. Must use squash, stretch, at least 3 bounces, and the ball turning while rolling.
Project 2: Spirited Ball
Give the ball character and personality. Have it interact with the pre-animated gator and have it attempt to reach the other side. Like I said, the gator was pre-animated, I did not animate it. So we had to find a way that the ball would act and react naturally to how the gator was acting. I chose for the ball to make it, but then not make it. Wile E. Coyote came to mind on this project.
Project 3: Natural Box
Animate the character pushing the box off the cliff. The box must move naturally and indicate its weight weight. I chose a heavier box. It was much more fun to have the character almost use to much force and fall off the cliff.
Project 4: "This is MY HOUSE!"
Animate the legs, box, and ball in 220-260 frames. The legs must shift and put a foot on the box and kick the box. How the rest of the animation plays out was up to the student. I wanted to do something a little more challenging and have the legs turn the box over before kicking it. The instructor worried that was going to be too difficult, even though he and the assistants liked it. So I completed the box turn over for him to prove I could do it, then he allowed me to animate the rest. What was the difficult issue was timing. I did not set my key poses in the right timing, and as I worked, I was following that animation till the graph editor was a huge mess. Here I thought I was going to have my animation be too fast. However, my animation was too slow. Time to learn from my mistakes and set those keys up correctly before working my in-betweens.
This Month: Rigging Basics (RBA) & Production Modeling (PRM)
So far the schedule is somewhat back to normal. 5pm-9pm lectures and 9am-1pm labs is more suitable to me than getting up so early in the morning. But I wish I could go back to the schedule of having lab right after lecture so I would have 52 hour time span to finish the work before moving on to the next lecture than 4 hours.
RBA is rigging from what I learned in 3DF, but later on in the month we will learn scripting and how to make our own toolsets. I've never been a programmer or learned coding, and so far rigging and scripting worry me. I better put an extra foot forward in this class.
As for PRM, it is also like 3DF, but with the objective of learning a new program. I've gotten use to the Maya interface, but ZBrush will take more getting use to. The zoom and pan rotate tools are extremely different than Maya, and it may be because I am now using a pen instead of a mouse to cruise around the program. We are doing nothing but Speed Sculpts, and I fear the instructors want us to get use to the tools while working fast. I am freaking out, I am not use to ZBrush and I'm trying to exert out as much quality work I can out at such a beginner stage. I am definitely using this summer break to play with ZBrush.
Speaking of which, I could really use that break. Been exhausted and stressed out lately, that I could use some time to just not think about schoolwork for just a few days. Till next month!
Concept Art and Sketches
Within these folders you will find exclusive concepts, pencil drawings and many, MANY sketches of my cartoons and comics.
$3/month
Working Hard
Since my last journal entry in February, I have been looking for work. I hadn't had much luck sitting and waiting in Missouri, so I moved to Los Angeles and been here for about two months now, working at a motion capture studio. We are finishing up a project, and I have check coming afterwards.
Life's Chicken And The Egg
There's been two parts in my life I wondered what would come first. It was the car or the job when I was 16, now it is the move or the career. Thanks to my dad, the car came first, and the job shortly followed soon after. My dad is also helping me with job leads, which I am thankful for, and we are still looking. With student loans just around the corner, I'm beginning to wonder, "Should I take the leap of faith and move to Los Angeles?" The benefits of having a local address would be exponential to the search, and yet if a career is not also around the corner, what happens to me then?
I must keep up with what I believe in, that everyth
It's All About Balance
Job hunting, working on projects, and the usual everyday eat, sleep, relax. It's tough to take a handle on things when life was planned for you for so long, then you are out on your own. Needless to say, I've always been a man with a plan. It helps knowing what you want to do, writing it down, then scheduling which to do first in order of priority.
I have plans to update my website with drop down menus and additional videos, displaying my Advanced Achiever Speech, the article written about me in a local newspaper back home, and future plans of Biography videos, expanding the details of my life and how I got to where I am today. Projects p
Big Challenge Forced Me To Disappear
Hello fellow Deviants.
Wow, last entry November of last year. Yeah something happened that took away my blogging time. I was taking my Animation test during my absence. I had to pass that in order to make it to finals. From March to August was finals, which leaves December to February to explain. Well I was thinking about what I wanted to do for my demo reel, a compilation video that sums up my best work to show to employers. I wanted to add motion capture to my reel (realistic motion as computer data), so I was brainstorming ideas. I had the daring idea to invite a music artist to Full Sail for a motion capture experience. It was to
© 2012 - 2024 JFStudioArt
Comments2
Join the community to add your comment. Already a deviant? Log In
tis spiffy seeing your projects and
the videos of your projects jager! wooo!
the videos of your projects jager! wooo!